UV DTF Printer
UV DTF Printer: Multitool of Printing Universe
This printer combines UV printing with direct to film (DTF) technology, allowing you to print your designs onto special transfer films. That's not all! You can also transfer those designs onto almost all hard surfaces.
Advantages of UV DTF Transfers
Multi-Material Compatibile: Works well with glass, metal, wood, plastic, and ceramic.
No Primer Required: Print as is without primer, unlike traditional UV printing.
High-Definition & Long-Lasting Images: Vivid colors, scratch-resistant, and fade-resistant for long-term durability.
Compatible with Irregular Surfaces: Ideal for curved or irregular surfaces, which opens up more product possibilities.
Applications of UV DTF Machine
For Personalized Products: UV DTF transfers delivers vibrant colors and intricate designs, making it suitable for common products such as phone cases, gift boxes, and cups. It fulfills your creative decoration needs.
For Functional Decor: UV DTF decals/stickers are also used for functional purposes such as labeling and decoration. It may be placed on laptops, helmets, or even home appliances, combining function and beauty.


How to Use UV DTF Printer
1. Pattern Printing: The UV DTF printer first prints your design on to special film (Film A) and applies a coat of UV-curable adhesive.
2. UV Curing: UltraViolet light then quickly cures the ink, and the design with good adhesion is created.
3. Lamination: Film B (the backing film) is subsequently laminated over Film A, and the design receives its adhesive backing.
4. Transfer Application: Apply the decal/sticker onto the subject.
Why Choose InkSonic's UV DTF Printer
When it comes to UV DTF printing, the InkSonic A3 UV DTF Printer VF13 stands out as a top-tier and best choice for both professionals and hobbyists.

With user-friendliness and superior output in mind, the VF13 offers a variety of defining features:
2-in-1 Printing and Lamination: The VF13 combines printing and lamination into one device. With the introduction of UV light as a means of instant curing and heat-roller lamination, it prints crystal-clear stickers directly, reducing your workflow and saving precious space.
Single Printhead, Double the Speed: Equipped with a high-speed Epson DX7 printhead, the VF13 delivers unparalleled performance at 8ft²/h. It prints ultra-fine details with a 1440 dpi resolution, meeting different design requirements without compromising speed.
Trusted Printhead Protection: The printer boasts a 3-triangle printhead protection system comprising accurate suction, smooth-gliding rails, and collision sensors. Such a frame ensures stable paper feeding, smooth carriage movement, and guarding against potential collisions.
Space-Saving, Silent, and Mobile: Small and lightweight, the VF13 can comfortably fit into home or office settings. It is quiet in operation and sports a heavy-duty base and four silent casters for effortless mobility and arrangement wherever needed.
UV DTF Maintenance Tips
1. Daily Maintenance of Printhead
Before work:
Test the print head to ensure that the ink flows smoothly and clean the print head if necessary.
After work:
Test the print head and save the test ink strips for comparison the next day.
Place the print head on the ink pad to prevent clogging caused by ink drying.
2. Keep UV DTF Printer in a Clean State
Wipe the printer surface clean of dust and residue.
Keep the working area clean to prevent contamination and damage to printer components.
3. Storage and Maintenance of UV DTF Supplies
AB film storage: Please place in a dry and cool place, avoid direct sunlight, and handle carefully when placing to avoid moisture. Please check the film before printing to ensure that the film is dry, smooth and wrinkle-free.
UV ink storage: Keep in dark and check the ink regularly to maintain fluidity and quality. Low-capacity ink is best for low-volume printing to minimize the likelihood of extended exposure of the ink.
UV ink must not be left uncovered in contact with the air for too long a time. Thus, after use, kindly close the ink bottle and store it in the dark and cold.
Check container seals regularly for damage
Regardless of the precautions, issues like smudges of ink, fuzzy prints, color inaccuracy, creased film, and poor adhesion may sometimes arise in UV DTF printing. When they do, it is better to stay calm, give yourself some time, and diagnose logically. Usually, the cause of the issue lies either in hardware or software.
Software Inspection
| Optimization | Optimization Techniques |
| Print Resolution | Adjust the print resolution to maintain a balance between print speed and quality. The resolution needs to be high in order to brighten up the image but lower the print speed. |
| Ink Volume | Use small quantities of ink to prevent bleeding and deliver uniform prints. Use ink to achieve the required color density. |
| Curing Temperature & Time | Balance cure time or temperature to improve adhesion of the ink to the material and lengthen the life of the print. |
| Mechanical Adjustments |
Regularly check and maintain the printer's moving components, such as the print head, carriage, and film feed system, in good working condition.
|
Hardware Screening
| Common Issues | Potential Causes | Troubleshooting Steps |
| Print Color Lines |
Foreign objects scratching the image; Poor print head condition
|
1. Check if there are foreign objects on the platform. 2. Keep and clean the print head clean so the nozzles are free.
|
| Blurred Image |
Inconsistent film feed; Mechanical issues |
1. Check and align the print head to be in the right position. 2. Improve film loading and tensioning to prevent film misalignment. 3. Check and repair the printer components to eliminate mechanical failures.
|
| Color Inconsistency |
Inaccurate color profile; Ink shortage; Mixing colors - a print head condition |
1. Verify and update the color management profile to ensure proper color settings. 2. Refill ink to avoid missing colors. 3. Calibrate the printer regularly to produce accurate color printing.
|
| Film Wrinkling |
Improper film loading; Tension issues in the film path; Environmental factors (humidity) |
1. Follow the film loading guidelines to ensure proper film placement. 2. Position film feed guides and tensioners properly to keep them at the right tension. 3. Control environmental conditions so that temperature and humidity are in order.
|
| Poor Adhesion |
Insufficient ink adhesion Incorrect coating application Material incompatibility Low heat press temperature and short time |
1. Ensure the film surface is suitably prepared and coating is applied uniformly. 2. Use high-quality film designed specifically for UV DTF. 3. Adjust ink coverage and curing settings to ensure good adhesion with the film. 4. Wait for the heat roller to reach the appropriate temperature before printing and set the correct speed.
|
| White Ink Issues |
Clogged white ink nozzles Inconsistent white ink flow Pigment sedimentation in the ink |
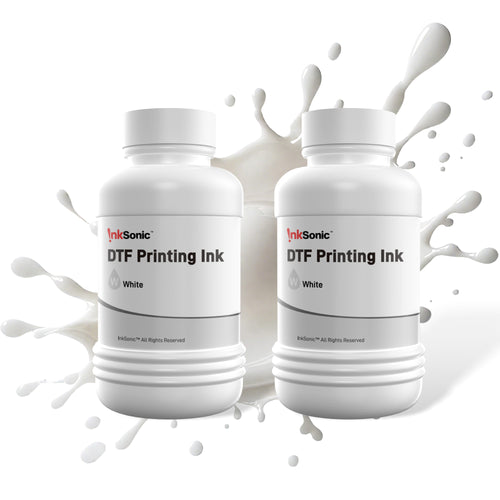
1. Clean and unclog the white ink print head to ensure smooth ink flow. 2. Regularly stir and circulate the white ink to prevent sedimentation. 3. Use specialized maintenance products for white ink to maintain its quality.
|
How to Remove UV DTF Transfer Patterns on Hard Surfaces?
Be it for some temporary event for which the sticker was used, or you just put it incorrectly, or perhaps it's damaged; here's a comprehensive guide to help you get it off easily:
Method 1: Hot Water
Step 1: Soak the glass with a UV DTF sticker in hot water at about 80° C for 5 to 10 minutes; this can warm up the adhesive and weaken its bond with the surface.
Step 2: With the help of a plastic scraper, peel the whole UV DTF sticker from the glass and avoid scratching.
Step 3: Spray any remaining adhesives on the surface with isopropyl alcohol or even an adhesive remover until it becomes dissolved.
Step 4: Clean the surface completely and let it dry with a clean dry towel.
Method 2: Hair Dryer / Heat Gun
Step 1: Heat the UV DTF sticker with the heat gun carefully without heating the surface beyond its safe operating temperature.
Step 2: Heat the adhesive and gently pry it away with a plastic scraper.
Step 3: Apply isopropyl alcohol or adhesive remover to any residue remaining.
Step 4: Clean the surface with a soft, dry cloth.


![A3 UV DTF Printer with Stand - VF13 [Pre-order]](http://www.inksonic.com/cdn/shop/files/uv-dtf-printer.png?crop=center&height=20&v=1747306144&width=20)


